

Nut Bottomed Out but Joint Still Loose? Thread Length Is the Hidden Failure Point
Solar installation failures don’t always come from bad material.
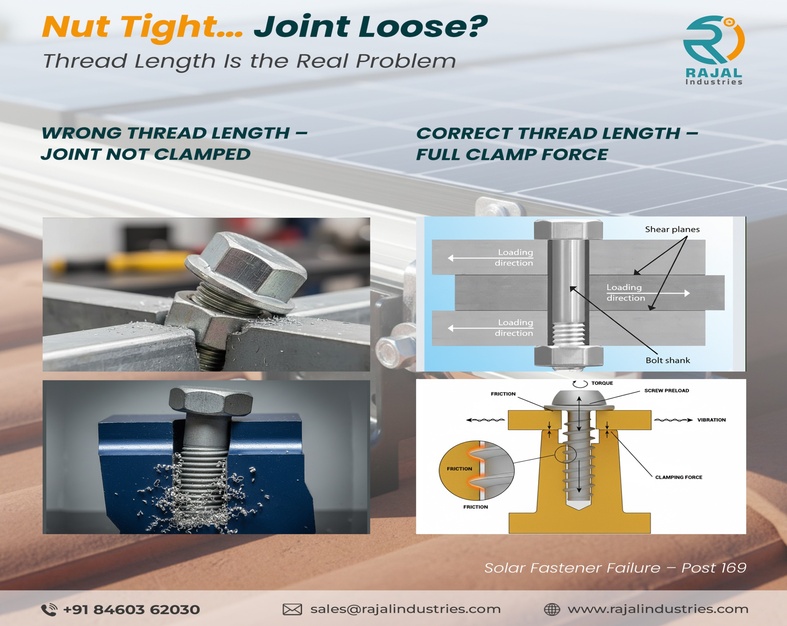
Sometimes, the bolt itself is fine — and still fails.
That’s exactly what happened when a batch of M10 × 25 bolts reached site.
The bolts fit.
The nuts threaded smoothly.
But during tightening, the joint never clamped.
The nut stopped.
The assembly stayed loose.
What really caused the failure
The usable thread length on the bolt was shorter than the actual joint thickness:
- 1. Bracket
2. Washer - 3. Spring washer
4. Nut
= Required clamping length
But the bolt’s threaded area ended too soon.
So the nut bottomed out on the shank.
No force transferred to the joint.
No compression.
No locking
Why this is common in solar projects
Solar structures often use:
- • Multiple washers
• Thick brackets
• Serrated flanges
• Long nuts
• Spring washers
But most purchases focus on:
“Just give M10 × 25.”
Without checking:
• Thread start position
• Nut depth
• Washer stack height
• Bracket thickness
Result: perfect fit, failed function.
Real consequences on site
- • Torque wrench clicks early
• Joints feel loose after tightening
• QC rejects installation
• Entire batch removed
• Work stops
• Procurement faces pressure
This is not a coating issue.
This is not grade failure.
This is geometry.
How to prevent it
Before ordering, confirm:
✅ Total joint thickness
✅ Minimum required thread engagement
✅ Nut depth
✅ Washer count
✅ Thread length on drawing
✅ Part-thread or full-thread needed
✅ Trial assembly test before dispatch
Best practice for solar EPC teams
Never order bolts by diameter and length alone.
A proper fastener requirement must include:
- • Thread coverage
• Nut specification
• Washer thickness
• Clamping range
A bolt that doesn’t clamp
is a liability.